
Tips for Using Camera Stabilizers Like a Pro
If you’re looking to elevate your videography game, mastering the use of camera stabilizers is essential. Whether you're a beginner or an experienced filmmaker, understanding the nuances of these tools can help you achieve buttery smooth shots that captivate your audience. In this blog, we’ll walk through some practical tips to ensure you're using camera stabilizers effectively, making your footage look polished and professional.
Understanding the Different Types of Camera Stabilizers
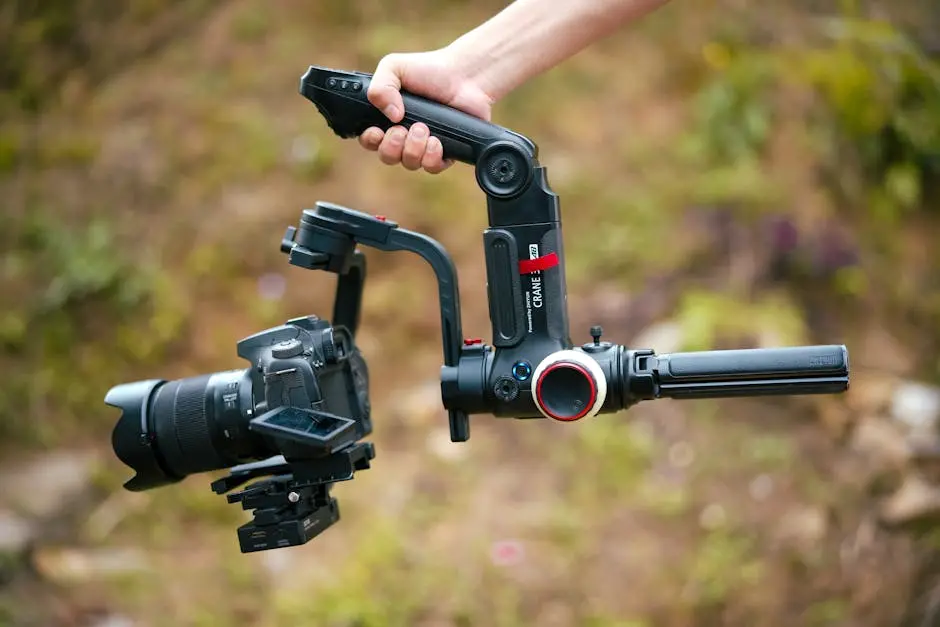
Before diving into tips, it's essential to know the various types of camera stabilizers available, including handheld gimbals, shoulder rigs, and steadicams. Each has its unique features and ideal use cases, so familiarize yourself with them! Handheld gimbals, for example, offer unparalleled freedom of motion and are great for run-and-gun shooting. They allow you to move fluidly while maintaining stability, perfect for action shots.
On the other hand, shoulder rigs provide better weight distribution, making them suitable for longer shoots. They can be a bit bulky, but they offer a grounded feeling during your shots. Steadicams, known for their balancing capabilities, are wonderful for creating smooth cinematic looks. By understanding these types, you can make an informed choice on which stabilizer fits your shooting style best.
In essence, knowing the differences means you'll be better equipped to select the right tool for your project. Whether you're making a travel vlog or a short film, the stabilizer you choose can fundamentally change the way your visuals are perceived.
Balancing Your Camera for Optimal Performance
A well-balanced camera stabilizer is crucial for smooth operation. We'll cover the steps to achieve perfect balance, which not only helps in stabilizing your footage but also reduces strain on your stabilizer’s motors. The first step is to adjust the camera's position on the mount. Ensure it's centered, as even slight misalignments can lead to issues during your shoot.
Next, you'll want to adjust the tilt and roll axes. Gimbals often come with calibration options, so don't skip this step! It's beneficial to set aside time to balance your equipment before you begin filming. Testing balance can save you countless headaches later on. If you notice any drift during your test, go back and check each adjustment until your setup is perfectly aligned.
Balancing isn’t just about avoiding technical glitches; it enhances your overall shooting experience too. A properly balanced stabilizer allows for smoother, longer operation without the worry of motor burnout. So, take some time to master this step! Your future self will thank you for it.
Practicing Basic Movements
Mastering basic movements such as pans, tilts, and tracking shots is essential for harnessing the full potential of your stabilizer. Tips on how to practice these movements effectively will be shared. Start small; practice slow pans across static objects. Focus on keeping your movements steady and controlled. Remember, it's not about how fast you can move, but rather how smooth you can execute each shot.
Tilting your camera can also be a game changer. Try combining tilts with your pans for a more dynamic feel. When tracking, be mindful of your center of gravity and the weight distribution on your stabilizer. A soft touch can go a long way in creating seamless transitions. Practicing these movements diligently will instill muscle memory that pays off during your main shoots.
As you practice, don’t hesitate to experiment with angles. Different perspectives can bring a fresh eye to your shots. Allow your imagination to roam and remember to have fun with these exercises! Each practice session is not only about improving technique but also about discovering your unique style.
Incorporating Advanced Techniques
Once you're comfortable with basic operations, it's time to explore advanced techniques like the 'Aerial Shot' and the 'Crane Move'. These techniques can elevate the dynamics of your shots. The Aerial Shot allows you to capture sweeping landscapes or bustling cityscapes from unique angles. To master this, you'll want to start from a lower position and gradually rise, creating a sense of grandeur. This shot often requires a bit of creativity as well as finesse.
The 'Crane Move' is another fantastic technique. It mimics the motion of a crane, enabling you to rise above a scene while smoothly transitioning to focus on specific subjects. The fluidity of this move can really captivate an audience. Ensure you practice your entry and exit points—these are crucial for avoiding jarring movements that disrupt the flow of your video.
Together, these techniques can transform ordinary footage into something that truly resonates with viewers. As you start to incorporate these advanced moves, don’t forget to maintain the basics—smooth motions, balanced shots, and keeping your focus consistent. It’s all about combining foundational skills with creative exploration.
Common Mistakes to Avoid
Even seasoned videographers can fall into common traps when using stabilizers. We'll identify these pitfalls and how to avoid them to ensure your footage remains error-free and professional. One major mistake is overlooking the power of weight distribution. Having imbalanced gear can lead to excessive strain on your stabilizer’s motors, impacting performance. Always double-check your setup before every shoot.
Another common error is neglecting to practice on actual movements before filming. While the basics may seem familiar, practicing in real-time scenarios helps you fine-tune your skills. Don’t wait until the 'big day' to try new techniques. Instead, take the opportunity to test them in varied environments.
Lastly, be cautious about your framing and focus. It’s easy to get caught up in the fluidity of your stabilizer and forget about basic cinematographic principles. Always keep your shots intentional to avoid looking amateurish. In summary, stay mindful of these mistakes! Awareness is half the battle, and noting them down can help you significantly improve your overall videography skills.
Reviewing Your Footage
Understanding how to critique your footage will help you improve. We’ll discuss what to look for in your shots and how to make incremental improvements moving forward. One crucial aspect of reviewing your footage is assessing stabilization. Does it look smooth, or are there any jerks that need addressing? This reflection will guide your next practice session.
Another area to focus on is the narrative flow of your shots. Do your movements enhance the story you’re trying to convey? Sometimes a shot can feel great on its own but may disrupt the overall narrative. Take the time to evaluate this during your review process to elevate your projects.
Lastly, don’t forget about audio! If you captured should, it is often just as important as the visuals. Look for clarity and how well it syncs with your imagery. Putting all these elements together during the review phase will allow you to see where improvements are needed and shape your artistic voice. This approach grants you a clearer perspective on your growth as a videographer.
Final Thoughts on Camera Stabilizers
By following these tips, you’ll be well on your way to using camera stabilizers like a pro. Remember, practice is key! The more you familiarize yourself with your stabilizer, the better your shots will become. Dive in, experiment, and don’t forget to have fun with your filmmaking journey!