7 Easy Portrait Lighting Setups
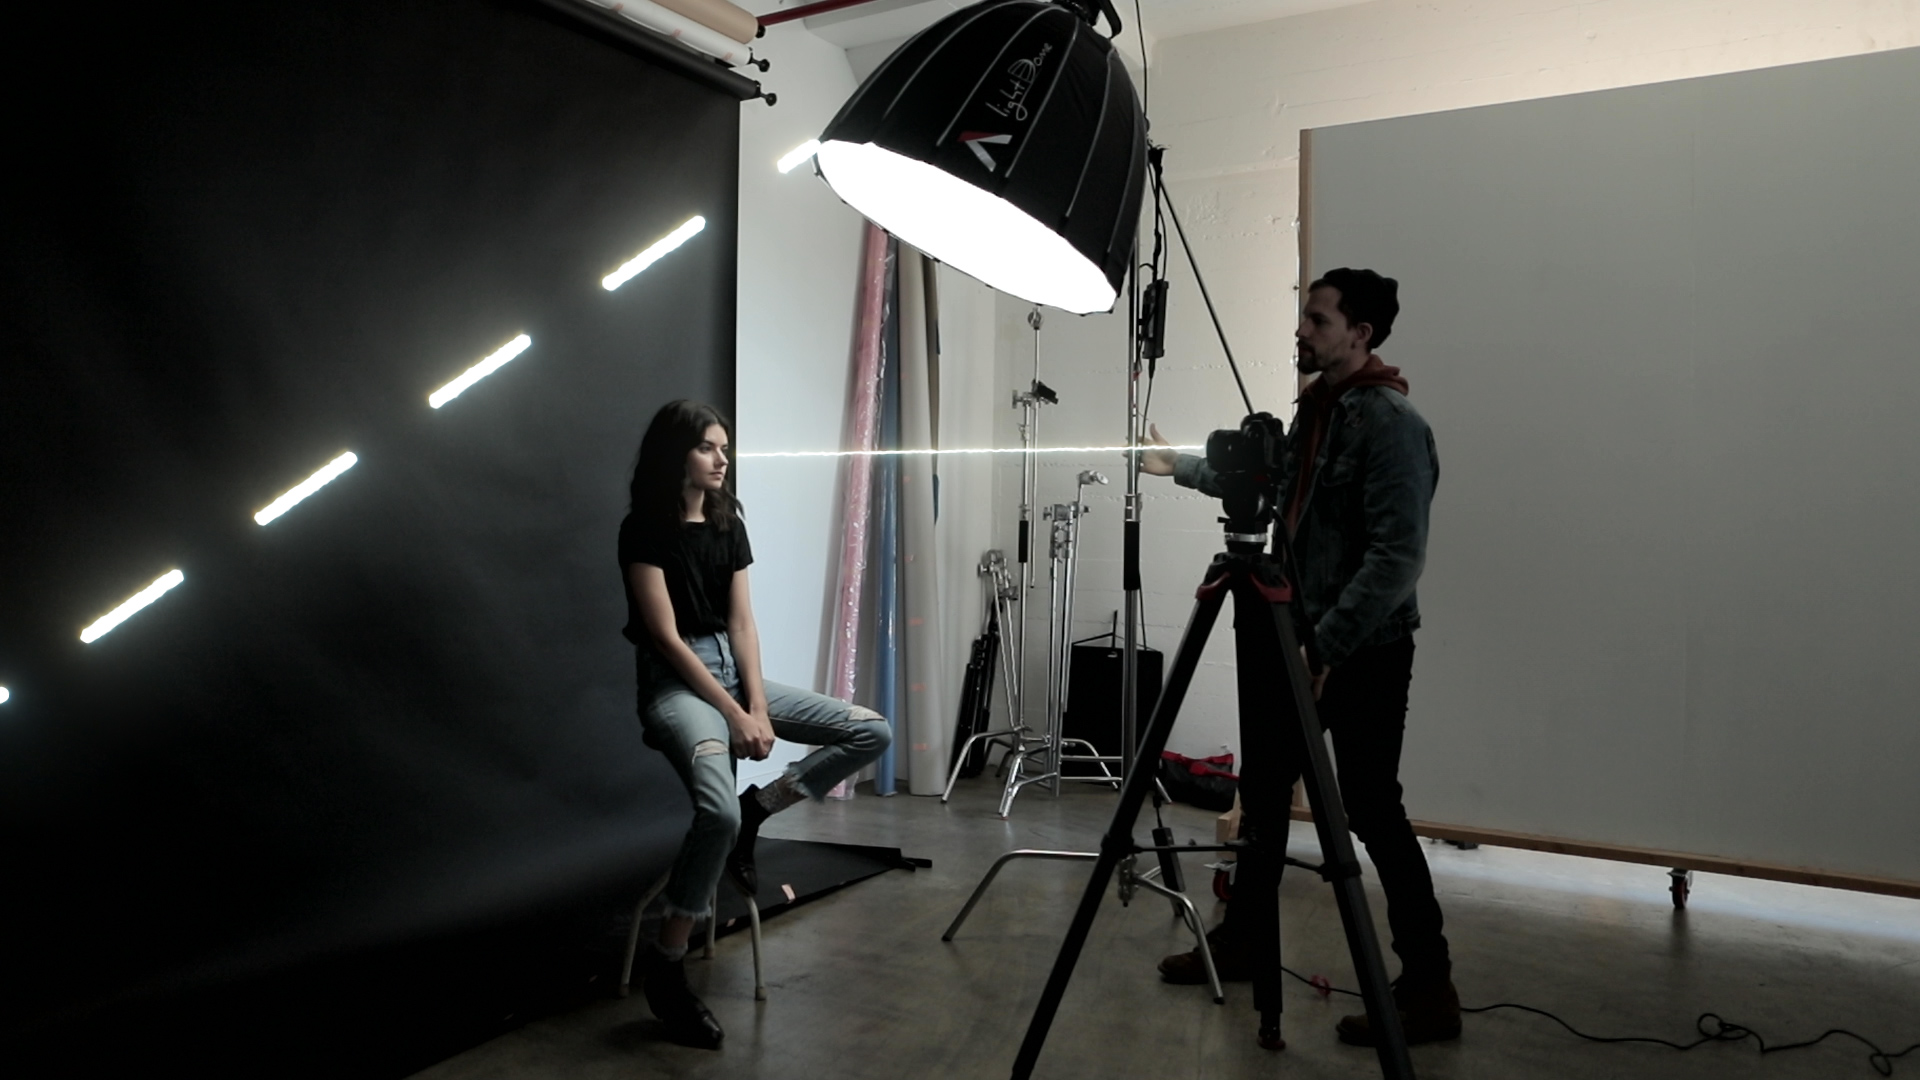
Here’s a simple breakdown of 7 different lighting techniques you can implement next time you shoot portraits with studio lighting. For these examples, we used continuous lights to better illustrate it, but you can strobes as well, of course.
BUTTERFLY LIGHTING
Butterfly lighting (sometimes called “paramount lighting” which is a way less fun thing to call it) is one of the most flattering lighting setups for most faces, so don’t even think about lighting me any other way. Your goal is to create a butterfly shape in the shadow under the nose. To do this, place the directly above and pointed down at your subject. This will create dramatic shadows under the cheeks, nose, and chin, and that is the tea (?).

Butterfly setup
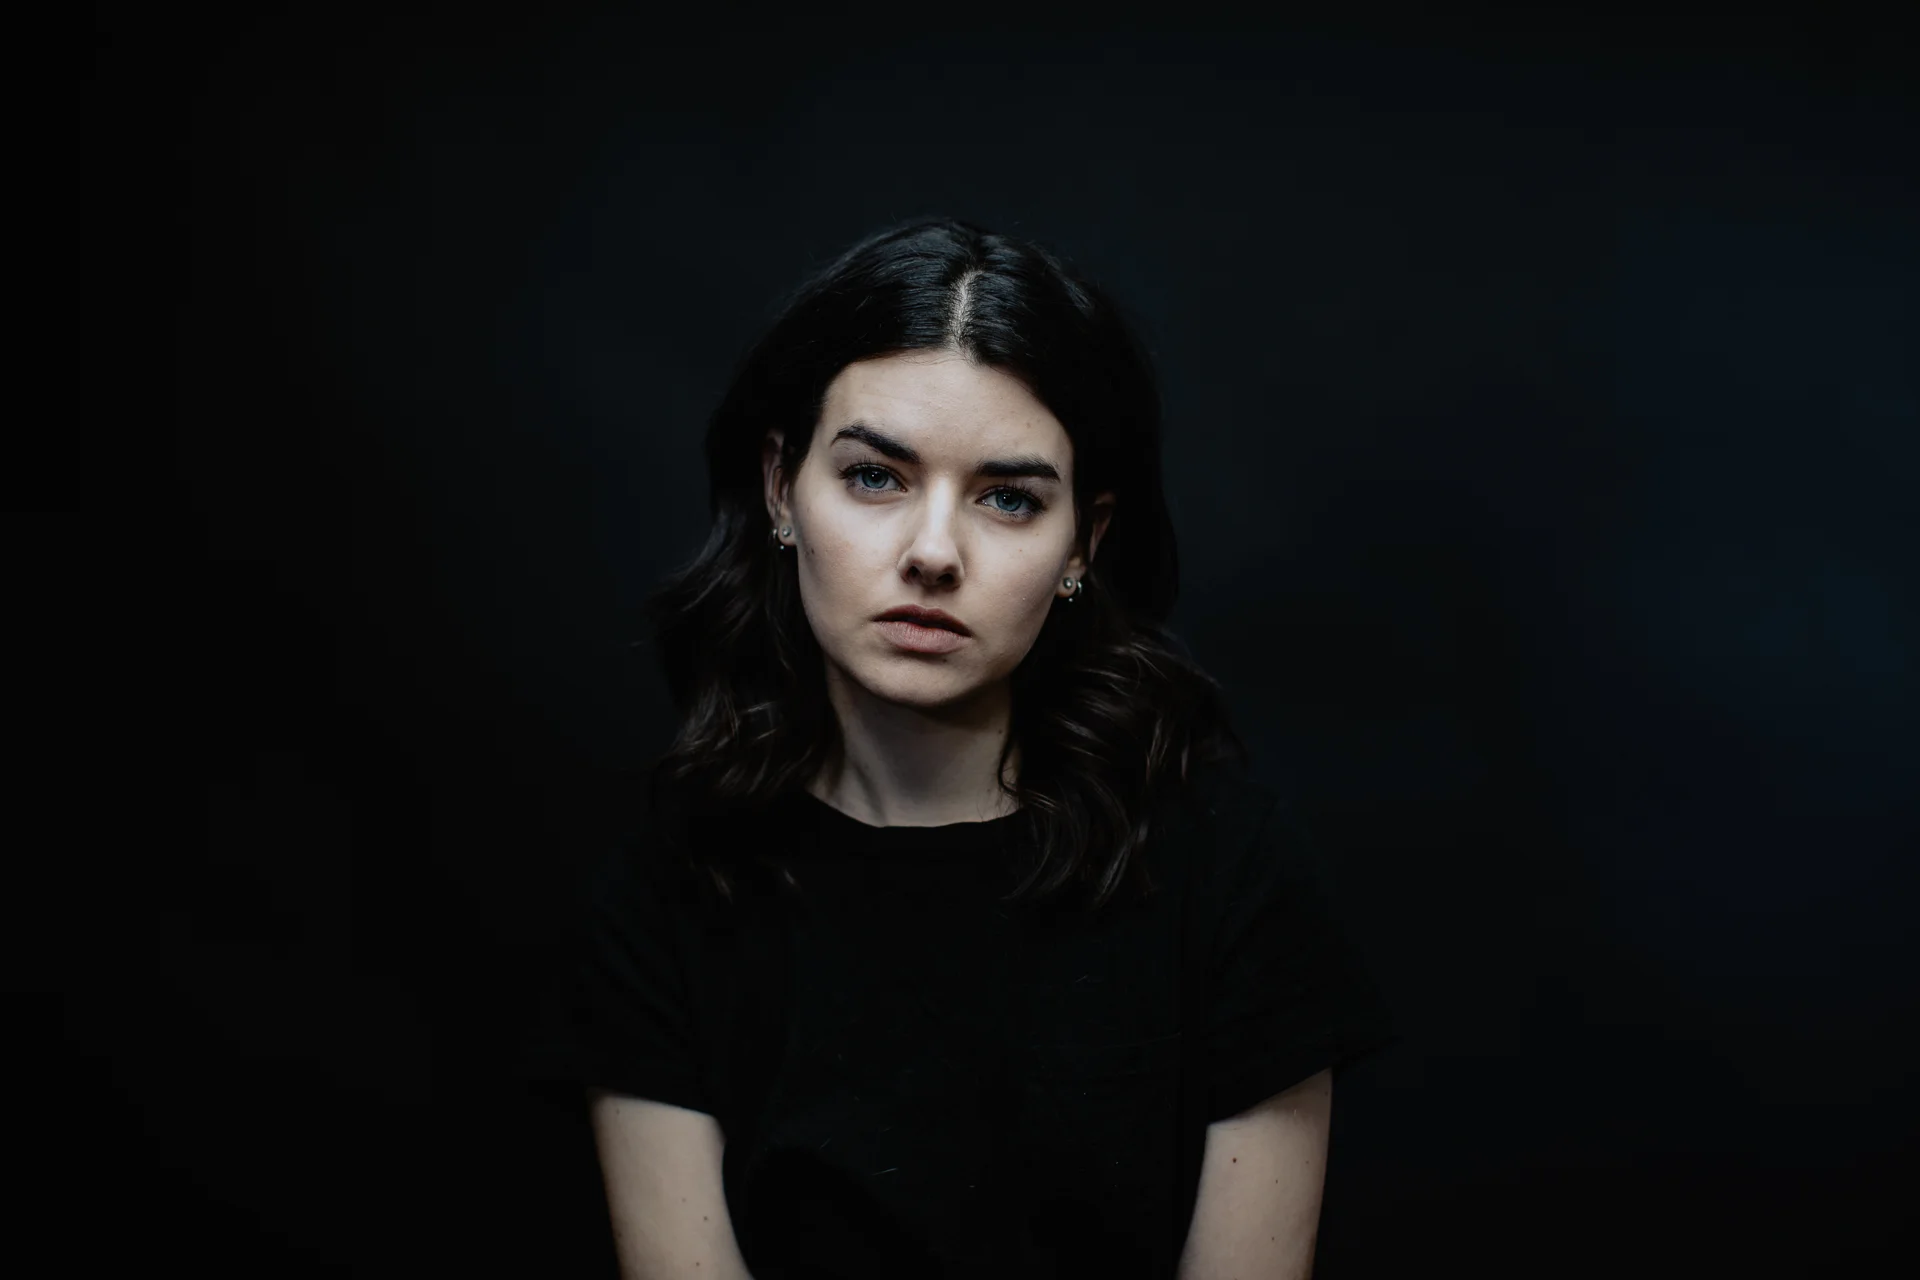
Butterfly Ligthing
LOOP LIGHTING
Loop lighting gets its name for the circle of light cast around your subject’s face. To achieve loop lighting, start with butterfly lighting and then move your light source slightly further to the right or left. Push it until a shadow appears on the opposite side of the nose, creating a li’l loopy (which was, unrelated to any of this, my nickname in college).
Loop Setup

Loop Lighting
REMBRANDT LIGHTING
For Rembrandt lighting, think “cheek triangle.” Rembrandt lighting is like a more dramatic loop lighting where the nose shadow connects to the cheek shadow, forming a triangle of light on the cheek. To achieve it, push your light a little further to the right or left of your loop lighting setup and point the light down at a steeper angle. After you snap the photo, yell, “cheeky, darling, really!” at your subject.

Rembrandt Setup

Rembrandt Lighting
SPLIT LIGHTING
Split lighting (sometimes called side lighting by no-nonsense gaffers who are just trying to get down to brass tacks) is perfect for creating an air of mystery. The setup is pretty straight forward. You just put the light to the side of your subject, leaving half of the face in the shadows.

Split Setup

Split Lighting
RIM LIGHTING
Rim lighting is great for separating your subject from the background and highlighting split ends. For this setup, place a light behind your subject and tilt it up towards the back of the head. This kicker light source should be more powerful than the light that hits your subject from the front for more drama, mama.

Rim Setup

Rim Lighting
BROAD LIGHTING
Contrary to popular belief, broad lighting is used to highlight the broad side of your subject’s face, and not just for clients named Karen who “would like to speak to your manager.” For this technique, place your light source to the right or left of your subject and tilt it down at her. Have your subject turn her body away from the light and face towards the camera. The goal is to get the broad side of the face (the side that’s closest to the camera and showing the most) covered in light and the short side of the face in the shadows.

Broad Setup

Broad Lighting
SHORT LIGHTING
Short lighting is basically the opposite of broad lighting (duh). You can easily achieve short lighting by finishing your broad lighting photo, yelling “freeze!” at your client, and then moving the light to the opposite side of her. You can also just have her turn her body towards the light, pushing the broad side of her face into the shadows.

Short Setup

Short Lighting